Gear- 35mm B&W
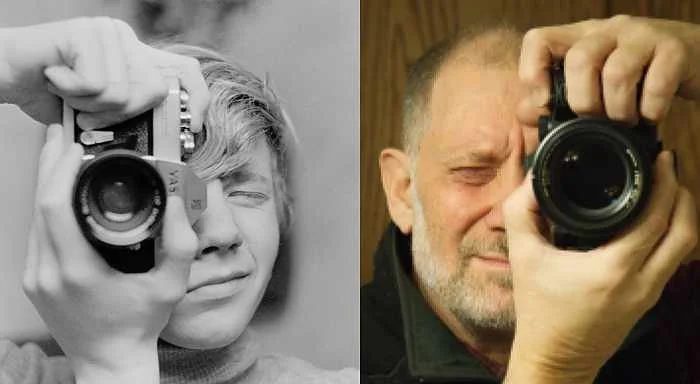
So, I felt the urge to revisit my roots and get back into film photography, with an old-fashioned celluloid medium. I’ll describe the setup below. I started off shooting color and black and white (B&W), though quickly realized that I was not prepared to go the distance with color. Though simpler than in the old days, still more complicated and exacting to get right. Not that good B&W is a cakewalk, but B&W is certainly simpler and closer to what I used to do in the old days. See here for description of accessories and digital options.
Since early teens, I craved a Nikon F2. I had (have) a cousin who got one (I was maybe 12-13), so there is clearly a bit of lust and avarice in this. Having outgrown (hopefully) the puerile craving, I decided to build an F2 outfit and maybe pick up the processing piece as well. I quickly found out (again) that labs to process film are few and far between, not to mention expensive. Turns out that sending in a 36-frame roll of 35mm film will run you a total of $50 (Shipping/return, processing, scanning), let alone including enlargement costs. I decided to get back into the processing business. A basic setup to develop B&W film (see below), will run you a grand total of $2-5/roll. So, that’s a deal breaker. Problem then becomes what to do with this strip of negative B&W film you have? You can take it to a local print shop (I have a great one here where I live), and you can get enlargements of frames you pick. This you will eventually do regardless, unless you set up your own dark room, which I do not have the space for. So, a quality scanner is the next option (again, see below), though this will inevitably run you significant $$ unless you go with a cheapie, low-res job that isn’t worth the effort if you’re serious about this. So, I decided to get a good quality scanner that would keep me serious about the craft and am now set up. Given the cost of the scanner ($1500) it will take me ~30 rolls or ~3 years at ~2 rolls/month to recoup my costs, but then you have to figure in the joy of fighting with chemistry and dust! Oh well, I’m a sucker for punishment.
Anyway, as I mentioned, I was preternaturally fixated on a Nikon F2 as the body to use. These cameras are indestructible, completely mechanical (save for the light meter, that you really don’t need), modular with all sorts of interchangeable parts. Key ones for me were the waist-level finder, interchangeable focus screens and prisms. You can get a motorized backs to shoot (relatively) fast bursts, but that entails large, bulk rolls of film and really is made obsolete by modern digital cameras, with high burst-rates. In all honesty, if the modularity is not important to you, then the FM2 is a better body to go with though spendier. Cannon also made tough, reliable bodies back in the day, though I never entertained going with Cannon, so can’t say much about it. The key thing about the Nikon F-series is that the bodies will accommodate an incredible range of lenses, even more modern ones, albeit in manual mode. It seemed the best way to go. And, you will likely hand your camera down to your grandkids.
So, I got two F2 bodies, thinking I’d have one for color and one for B&W. Having given up on color (at least for now), I can put film of different speeds in each and use the one best suited for the composition and exposure parameters. (But, see below on developing these films). I got one body with a DP-12 prism, which is the most modern version with sensitive meter of a wider, more reliable range and LED exposure indicators. Then I bought one with a DP-1 prism that uses an analogue exposure indicator, but a less sensitive and reliable meter. Obtaining replacement prisms is easy on the used market, they made a lot of these. I also got a waist level finder that does not have a light meter incorporated into it.
In terms of lenses, I got the Nikkor 50mm f/1.2 with the first body. This is an incredible lens. Fast, incredible optics and smooth. Next I got 2 E-series lenses, the f/2.5 35mm and the f/2.8 135mm. Both great lenses though in the Nikon “budget” E-series. The 135 is a nice, light and reliable mid-range telephoto lens. The really nice thing about all the old style Nikkor primes is that they all have a 52mm filter diameter, so you can use the same filters on all the lenses. Keeps cost down. Next, I got the Vivitar Series-1 f/3.5 70-210mm zoom lens, simply because this is what I grew up with back in high-school. It’s a medium fast lens with solid optics though a bit bulky. But then, I was used to it, it was in my bones. I found that the 35mm was not wide enough for the shots I like to make with wide angle lenses, so I replaced it with the f/2 24mm Nikkor. Another outstanding lens with minimum distortion at that angle. I found that the 135mm was redundant given the Vivitar zoom, so I gave that (and the 35mm) to my middle son who is picking up the craft.
The thing to know about classic Nikon/Nikkor lenses is that they come in pre-AI, AI and AS versions which are not interchangeable with all prisms for automatic exposure metering. The DP-1 prisms require AI lenses with the little rabbit ear coupling to engage the light meter. The DP-12 prisms require AIS lenses with a little ridge on the lens mount that engages a different style meter lever. All lenses will “work”, you simply have to meter your shot by pressing down the aperture button to stop-down the lens.
Once I figured out that mailing film in for development was a hassle (all USPS mailboxes now have a constricting baffle in the submission slot, so a padded envelope with a roll or two of film in it will not fit through. You have to go to the post office!) and expensive ($50/roll all told), I decided to develop negatives myself. A basic starter pack of tank, graduated cylinders, chemistries and et.&. will run you <$200. Throw in a changing bag (so you don’t need a dark room at all) and you are set. The thing to know, to be the most economical with your chemistries, is that you need to develop 2 rolls at a time (the tanks are built for this) but they need to be the same film speed, unless you’re doing some crazy pulling or pushing. So having two bodies with film of different speeds as I mentioned above, is really not all that practical.
Then you need to scan the negative so you can do the post-processing and et.&. Here there are many options from really cheap 75DPI USB peripherals you can get for C-note, and up. I wanted something with high resolution (4000DPI) and automatic processing, so I didn’t have to sit and feed in each frame, one at a time (I have done this with my parent’s slide collection and it is NO fun). I opted for a Nikon Coolscan 5000ED with an SA-21 film strip adapter that can be easily modified to behave like an SA-30 full-roll adapter. I built my own full-roll holder system from plywood and PVC pipe components for <$10 (as opposed to t$150+ for the official version). I was set!
Since analogue cameras obviously do not collect exif data, there is an app “Crown and Flint” (C&F) for the iPhone with a built-in exposure meter that lets you that. You then inject the data into the scanned images (you can use the shell script I made if you like). C&F is a bit cumbersome to use, particularly if you are used to quick shots with TTL metering. You have to use it for each frame/lens combo, i.e.: you have to remember to have your iPhone ready at hand and deliberately compose each frame on the iPhone before you do so with the camera and reset values if you change lenses or exposure settings. That said, if you have an unreliable (i.e.: Old) prism, you’ll need an external meter anyway, so not that many more steps. And, if you’re shooting B&W like this, you’re doing it because you want to be slow and deliberate. This app will certainly help with that! Reserve the quick-action shots for the digital camera or the point-and-shoot you have in your pocket. My gripe with C&F so far is that it crashed halfway through a roll of film, so I needed to manually assign (somewhat guessed-at) tag-values. That was a hassle. Hopefully an updated version will be more reliable.
Since the Nikon Scan 4 software for the Coolscan does not run on modern 64-bit computers (certainly not on a modern Mac) you’ll need alternative software. VueScan does a good job (which is what I chose) though requires an annual subscription for the Professional version you will need for automated, full-roll scanning. I hate subscription software. Alternatively, you can scrounge up an old 32-bit Windows box and run the native Nikon Scan 4 software on it. Of note, for full-roll, high resolution scanning you’ll need a LOT of memory. My M4 MacBook Air with 8GB simply choked. I have an old 2008 Mac Pro with an Intel Xeon processor and 32GB of RAM that I had no idea what I was going to do with. Turns out this box was ideal for the VueScan process and runs flawlessly.
Last thing to consider (thus far) is DUST management. I thought I had developed my film carefully, not touching it with anything, except on the edges for feeding into the scanner. The dust contamination was spectacular! Not sure how I’m going to handle this. My house is particularly dusty (Forced air heat and AC, so tons of it around). A full-blown clean room is obviously out of the question. More to come on that, I suppose.
Happy shooting.