Gear - Digital
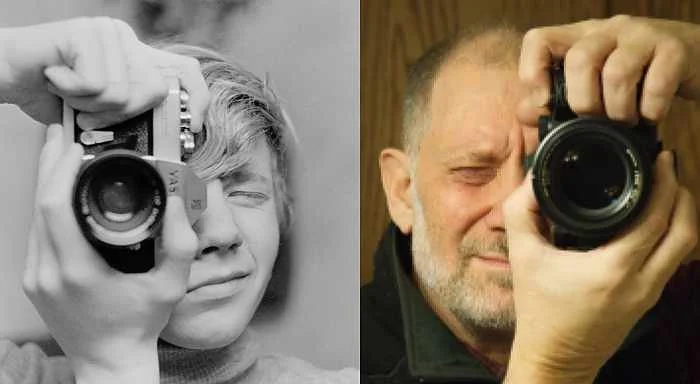
In the Old Country:
I was gifted my first camera to take pictures of my Boy Scout troop and our activities: A Yashica TL-Electro-X 35mm with screw mounted Yashinon f/1.7 50mm and Yashinon f/2.8 28mm lenses, to which I added a Vivitar Series-1 70-210mm zoom lens. The latter I bought unused from one of Norway’s premier amateur photographers Jens Bosshus-Jessen (spelling here probably wrong), who had won it in a contest and didn’t need it. I still use the Vivitar (with an adapter) for macro photography. Works pretty well. I had my own dark room in my younger days and did almost exclusively B&W, inspired by (though definitely NOT comparable to) Ansel Adams. This kit got me through high school and college, after which life got busy and photo less important.
Camera bodies:
Reaching a ripe old age I got back into photography, decided to go mirrorless and settled on Sony which seemed the leader in the mirrorless market. Initially I opted for the ILCE-7c (a7c) since it was compact (for backpacking) yet with adequate features. Three issues came up that made me upgrade: 1) I got the initial model without a mechanical shutter. This meant the sensor became an unprotected dust magnet and really impossible to keep clean. 2) The viewfinder is small and not too bright, hence my old eyes had problems achieving consistent focus even with magnification and peaking assist. 3) Given the compact form factor, the dials and buttons were exposed to inadvertent nudging, requiring needless and often overlooked fiddling. (The creator of the multifunction wheel should be shot). Between these three factors I was discarding so many otherwise good compositions I couldn’t stand it anymore. That said, the newer versions of the a7c do have a mechanical shutter, so the dust issue should be less of a headache, other limitations not withstanding.
So, I decided to upgrade and got the ILCE-7RV (a7RV). Bigger, heavier and spendier, but very happy with it. Particularly since the mechanical shutter minimizes dust exposure, the view finder is glorious and I can assign functions to well-protected and dedicated function wheels in ergonomic locations (and mostly ignore the ignoble multi-function wheel!). There are way more functions and options than I’ll ever use, but the high resolution is beautiful. File size (uncompressed RAW) is 124MB! And the 4- or 16- image pixel shifted high res files are ridiculously large, though you can use a loss-less compressed RAW closer to the 42MB of prior RAW files. I figured the extra $$ for the RV would be worth it vs. the 7 Mark-IV over the lifespan of the camera. Once the ILCE-7 Mark-IV gets upgraded to a Mark-V it will likely be a good and less spendy alternative.
Lenses:
I tried a couple of Voigtlanderwide and ultra-wide lenses for their compactness and simplicity (manual focus) but found too much vignetting and not compatible with the Atoll Camera Collar I came to love. So I traded them out.
Sigma 14-24mm f/2.8 DG DN Art LensA very nice lens and used for landscape and astro. All Sigma lenses seem to be big and heavy, though very well made with good optics. It’s part of my kick-around bag and always with me.
Zeiss Otus ML 50mm f/1.4 So, I got this lens as more of a vanity purchase, I guess, wanting to have at least one premium lens in my kit. I was looking for a fast 50mm prime and this one had just come out. Obviously spendy, though not as eye-watering as the original Otus series. Solid build, sharp, good color rendition and no noticeable aberrations that I, as a prosumer/enthusiast, will ever notice. At f1.4, great in low light and a great range of depth of field for a variety of compositions. The throw on the focus ring is wide, though not an issue with this lens that is clearly designed for very deliberate precision work. So, with my a7RV, a very nice combo. I was thinking of getting the Voigtlander 2.0/50 ApoLanthar, though a tad slower and the mount base on the Voigtlanders are a bit too snug in my Atoll collar (as discussed above). But, at 1/3 the price and optical quality in the top tier from what I can see of reviews, the Voigtlander could be a more accessible option for most. Would be interesting to see a thorough comparison. Overall, apart from the cost, an excellent lens that I am happy to have.
Sony Vario-Tessar T* FE 24-70mm f/4 ZA OSS Lens, which is a truly awesome lens and my go-to. Not super-fast obviously, but sharp and versatile. Wish it had a zoom-lock like the Sony 70-300
Sony FE 70-300mm f/4.5-5.6 G OSS. This one is also part of my kick-around bag and always with me. Again, not super-fast but sharp. I’ve not had any trouble with it.
Sony FE 200-600mm f/5.6-6.3 G OSS. This one is a monster and so big I seldom take it out unless I’m specifically targeting wildlife, which requires trekking into the wild, which means minimizing weight, which means... Well, you know what it means. I’ve used it for some astrophotography, though your tracker needs to be pretty accurate to avoid trails.
ZEISS Batis 85mm f/1.8this is a really nice, fast and sharp prime. Super for portraits and some astrophotography
Accessories:
Robus RC-8880 Vantage Series 5 Carbon Fiber Tripod. A rock steady, tall tripod at less than half the price of a Gitzo. What’s not to love? I got dedicated collars for the ball head, gimbal and Polaris, so easy to swap out heads. Adds to the price, though since you’ve not lost your shirt for a Gitzo you can afford it.
Robus RTH-1050 Triple Action Ball Head. Flawless, smooth, super easy/convenient to use. Very reliable
Benro GH5C Carbon Fiber Gimbal Head with PL100LW Plate. This is a smooth and reliable gimbal that works great on the Robus tripod. There are smaller gimbals out there, so when combined with the long lens it’s designed for plus a big, heavy tripod, you’re not likely to be schlepping this along peak-bagging on the PCT.
Benro Polaris Astro Edition 3-Axis Smart Tripod Head. OK, so I’m a gear head, but this thing is super cool and does a number of things. What it does NOT do is serve as a tracker for larger telescopes. It is not accurate enough. I’ve not tried it with smaller astrographs, but it can’t handle a 4” F7 Newtonian. That said, lower mag astro, panoramas (multi row!), time lapse, remote shooting… This does some pretty cool stuff.
Manfrotto Befree Advanced AS Carbon Fiber Travel Tripod with 494 Center Ball Head. This is a really nice, light travel tripod that’s easy to take with you on day hikes etc. Definitely not as sturdy as the Robus, but then, nothing is. The Peak Design Travel Tripod may be a bit sleeker, but is not designed for interchangeable heads and is way spendier.
Sony RMT-P1BT Wireless Remote CommanderMust-have
Kase K9 100mm Slim Entry-Level Filter Holder KitSo, here is an accessory I didn’t realize I absolutely needed. And, boy, will this run you some $$! I had no idea. But having worked without filters for a long time, then finally taking the plunge to get a system going, I see their value. A set of homogeneous and graded neutral density filters will open up universe of compositions you otherwise would miss out on. Post-processing tricks do NOT make up for this (though can help in a pinch). Most starter kits come with the holder, a circular polarizer and a couple of basic filters (and a roomy pouch, maybe. After all, you’re going to get MORE). I would avoid the gimmicky ones with specialized magnet holders, etc., since this will limit which filters you can use. Lee seems to be the industry leader though I found Kase to make good stuff at a lower price point. Happy I went with this one.
Silence Corner Atoll S+ Rotating Camera Collar for Select Sony Mirrorless Cameras (Black)This is the other essential accessory I never thought I needed. Really helps with landscape shots when you need to angle the camera properly for the best composition (eg: in canyons, valleys etc). Bulkier than an L-bracket but does not block side ports/connectors. Only issue is that while it is compatible with the Peak Design Clip, it is not compatible with the Manfrotto release plate system. So you have to attach a Manfrotto plate to it, adding to the bulk. Make sure your camera body is compatible with the particular model collar you are ordering. Tolerances are very small for adapting the collar around the lens seat/mount (like with the Voigtlander lenses I tried whose neck were too wide in diameter for the collar).
Peak Design 10L sling pack is my favorite bag. Customizable in all sorts of ways and very convenient. They say you can put a Macbook Air in the internal back pocket, though this did not work for me. An iPad, maybe. Their capture clipis a must-have. And, let’s face it, the Peak Design strap system is just pretty darn cool! Love these easy-on easy-off attachments (like when mounted on a tripod and you don’t want strap flap ricketing your shot). TRY to see any YOUTUBE photo guru without this system!
I’ve tried several backpacks. Lots of gimmicks out there. Depends on what you need it for. I need something for day-long treks into the wilderness, so need room for food, clothing, etc. in addition to the camera gear. I finally landed on the Mindshiftpack, which just barely handles what I need. Let’s face it (again), if you’re doing a multi-day back-country trek you’re going to prioritize the backpacking needs and not the photo aspect of things.
Post processing:
I did pretty well for a while with my M1 Macbook Air with 8GB RAM and two older external Apple Cinema Displays, though found that as I was running multiple apps and HDR or stacked images the system started to choke. So, I upgraded:
M4 iMac 2024 with 32 GB RAM and 10 core processor. This box with one external monitor (below) really smokes. I don’t do any video, so file sizes are not outrageous, but if video and lots of the 16-image pixel-shift images are your thing, you may want the latest Mac Mini or Mac Studio. But then, you have to have (or buy) the display(s), keyboard, mouse and camera that come with the iMac.
BenQ SW321C 32" 16:9 4K HDR IPS Photo and Video Editing Monitor. I love this monitor with its size, resolution and color profile. My old Apple Cinema Displays were 15+ years old, and the LEDs were fading so I could no longer calibrate them properly. Go for a smaller size than the 32” and save some $, but the display is a joy to use.
I use Affinity Photo-2 for all my editing, so no ongoing license fees, a great user community and all the features you need for a reasonable price. Photo is part of a design suite (at additional cost per component), so quite versatile if you do more than photo. All the components work together. Or so I’m told. I only do photo.
My workflow starts with Apple Photo, backed up a’plenty, then the native files also stored in a separate, central collection (also backed up a’plenty) and linked to metadata (extracted by exiftool by Phil Harvey, a must-have piece of software) and project info in a home-grown MySQL database with a PHP web interface developed using a great IDE called RackForms. The Rackforms author, Mat Grdinick, is a great guy and super helpful, if you are into the masochistic practice of programming for yourself. The MySQL database and interface lets me sort, search, assign to projects and expand capabilities in much more detail than Apple Photo, though Apple Photo has a nice, basic interface and palate of functions. But, once you have 12000+ images in your collection, finding a particular image in Mac Photo is a pain. The hard-drive, date-based folder system you see on various internet posts easily gets cumbersome. Did I say I have back-ups a’plenty? I think I have 10+TB of storage spread across several networked machines. Just lose some precious photos you can never get back, and you’ll ramp up your storage space in a hurry! Having off-site storage is also advisable though I hate putting stuff in the cloud. Hence this blog?! Oh well. Happy shooting!
Useful Links
Books
https://www.ligonier.org/ I decided to work my way through the bible one commentary at a time and more or less in chronological order. Ligonier has great recommendations for solid, mostly reformed commentaries and has been an invaluable resource for me getting into Scripture in good detail.
Gear
https://www.bhphotovideo.com/ Great resource for new and used gear.
https://www.adorama.com/ Another good resource for new/used gear
https://www.keh.com/ Good site for used gear
https://phillipreeve.net/blog/fe-lenses-sony-comprehensive-independent-guide/ Phil has really insightful, honest reviews of Sony alpha gear and is well worth consulting when you’re looking to acquire some new stuff.
Software
https://stellarium-web.org/ This is a great, free, on-line star map that will help you plan astro shoots.
http://www.photopills.com/ These guys are simply great. The enthusiasm they operate with is truly infectious. The software they promote has a steep learning curve and oodles of features, though they have plenty of other tips and tricks that will really help you.
Treks and Pros
https://alaskaphototreks.com/ I took my eldest son on a 2-day trek with Carl Johnson and learned a lot. His outfit has lots of worth-while treks for anything in the nature/astro photography genre. Highly recommended.
https://peterbredahldam.com/ Peter is probably the most mild-mannered guy you will run across. He has lots of experience to share both with front-end nature photography help and Affinity-photo post-processing.
https://capturetheatlas.com/Dan Zafra is another enthusiastic energizer bunny who has lots of experience and adventures to share, particularly when it comes to astrophotography.